— Experts Who Understand Water —
How to Stop Water from Entering a Partial Basement
Exterior Waterproofing and Footer French Drain Installation
Water intrusion in a partial basement can lead to serious issues like mold growth, foundation damage, and ruined belongings. If you’ve noticed dampness or pooling water after heavy rains, it may be time to tackle the problem from the outside. The two most effective solutions are exterior wall waterproofing and installing a footer French drain. Here’s a step-by-step guide to help you understand and execute these fixes.
Step 1: Diagnose the Problem
Before digging or sealing anything, confirm that the water is entering through the foundation walls or from the base (the footer level). Check for:
- Water stains on basement walls
- Efflorescence (white, chalky mineral deposits)
- Visible moisture or puddles near the floor-wall joint
- Damp or musty smells after rain
If these symptoms are present, exterior intervention is likely required.
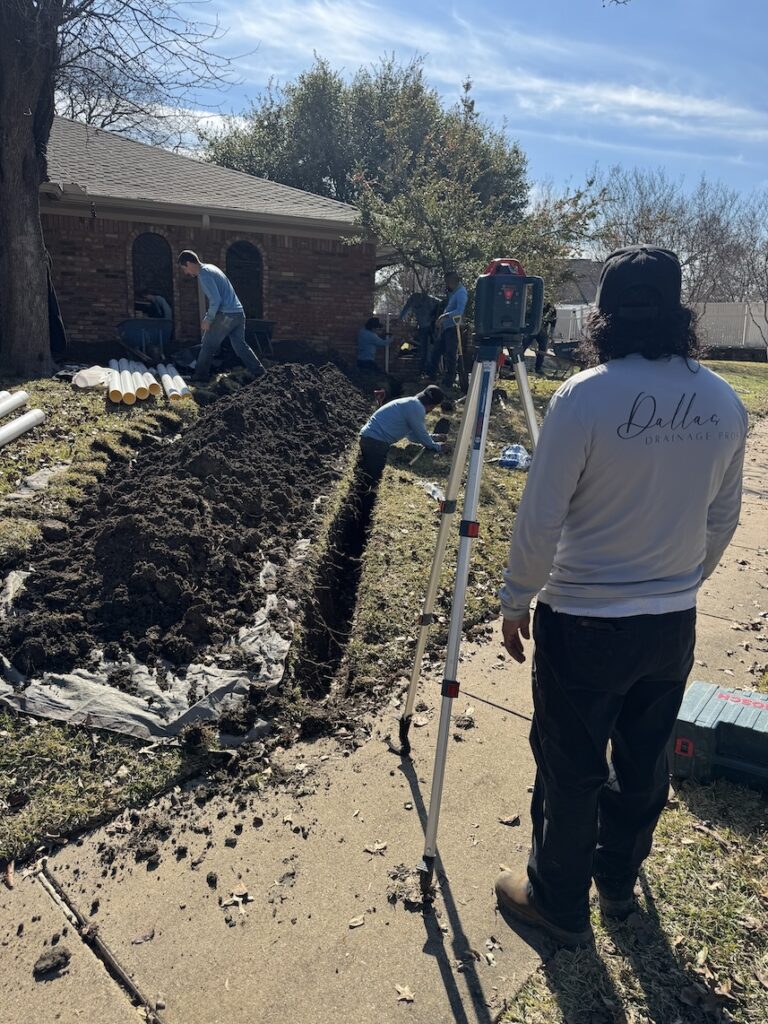
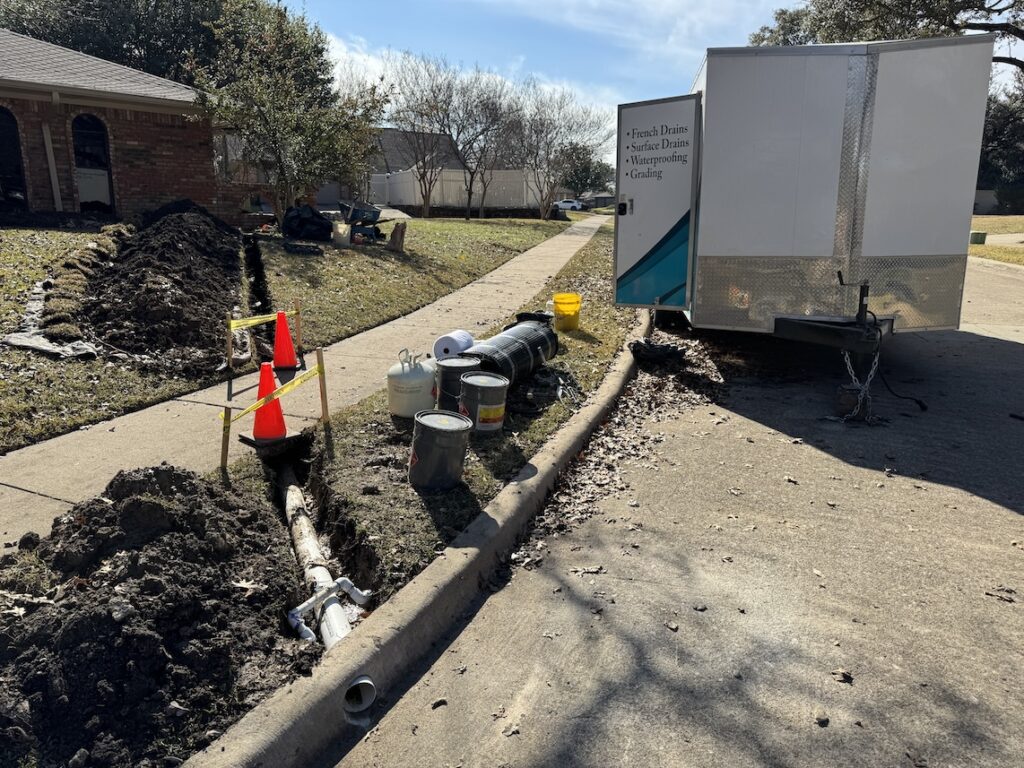
Step 2: Prepare the Site
Start by clearing the area around the problem wall. This includes removing any landscaping, walkways, or structures that are in the way. You’ll need room for excavation and space to work.
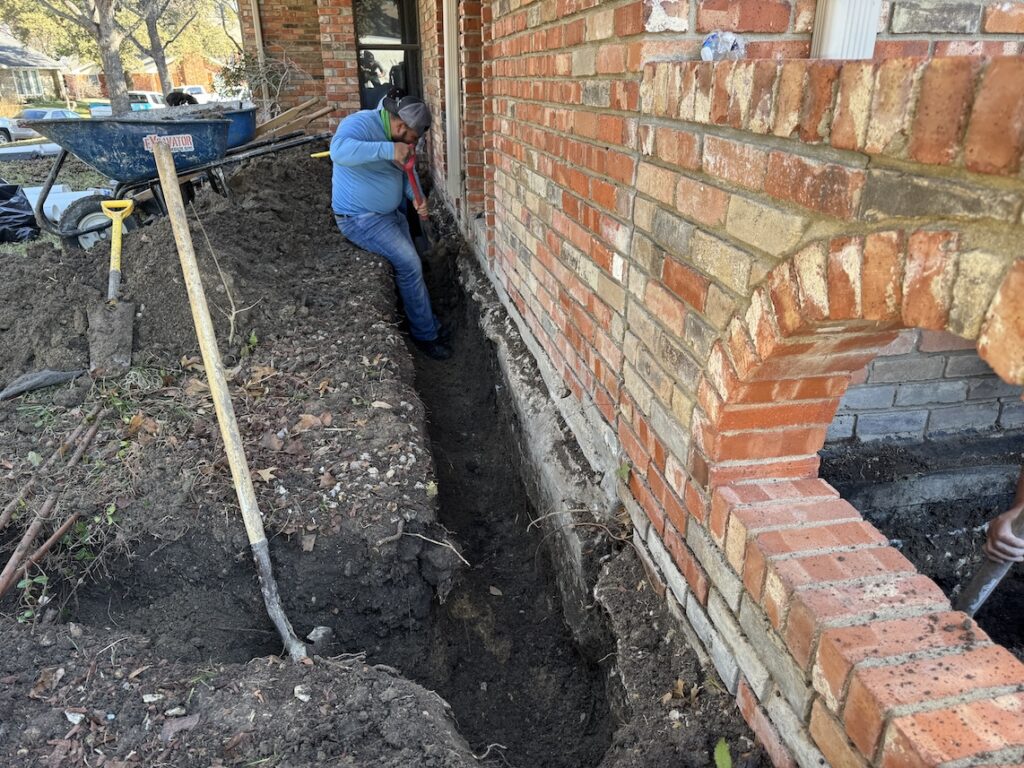
Step 3: Excavate the Foundation Wall
Dig down to the foundation footing along the affected wall. For a partial basement, this might not be as deep as a full basement, but still requires care.
- Safety Tip: Support trench walls as needed and call 811 to locate utilities before digging.
- Use a mini excavator or dig by hand if space is tight.
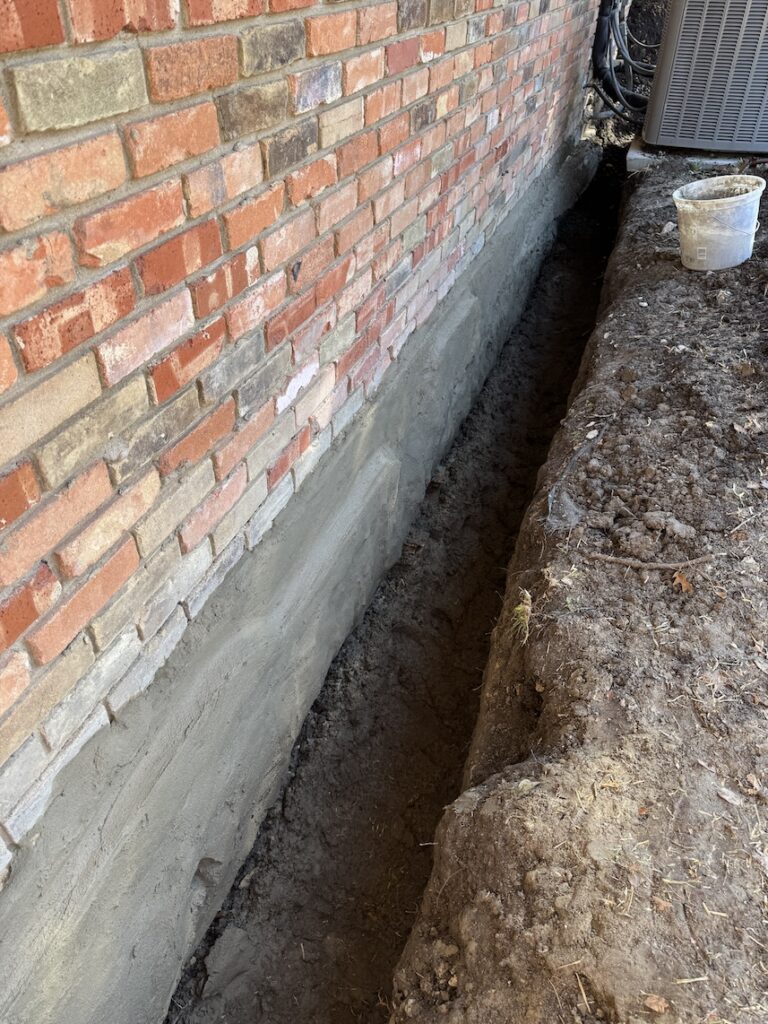
Step 4: Clean and Inspect the Wall
With the wall exposed:
- Clean off any dirt, mud, or debris with a wire brush or pressure washer.
- Inspect for cracks or damage. Small cracks can be filled with hydraulic cement; major structural cracks should be assessed by a foundation professional.
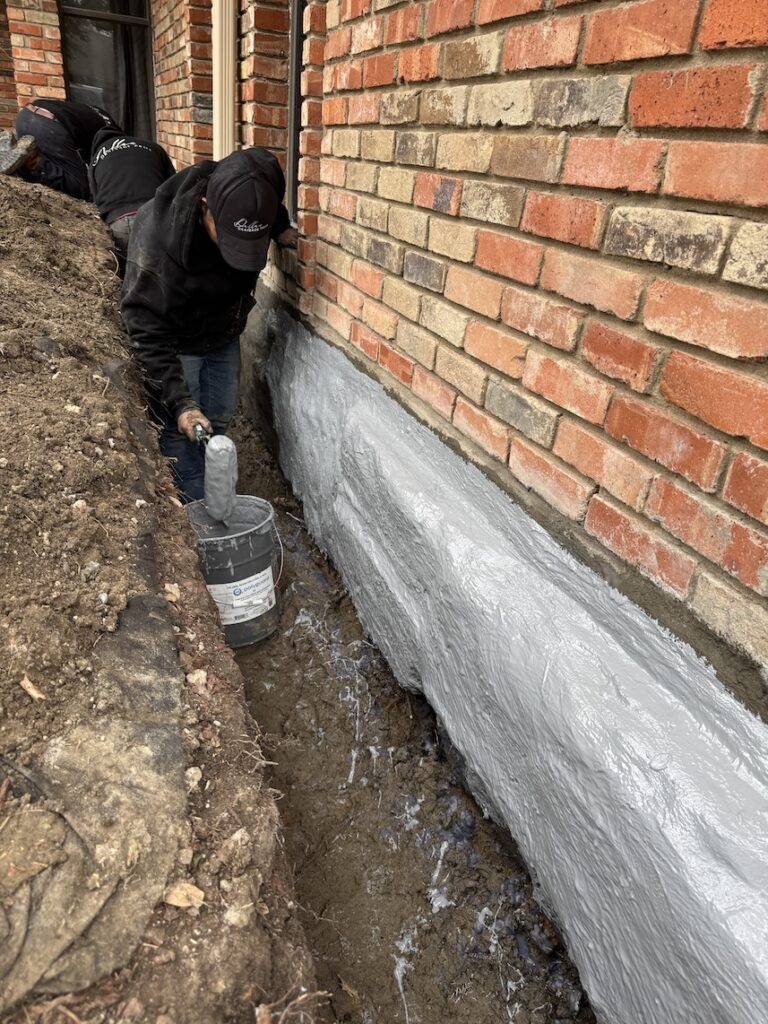
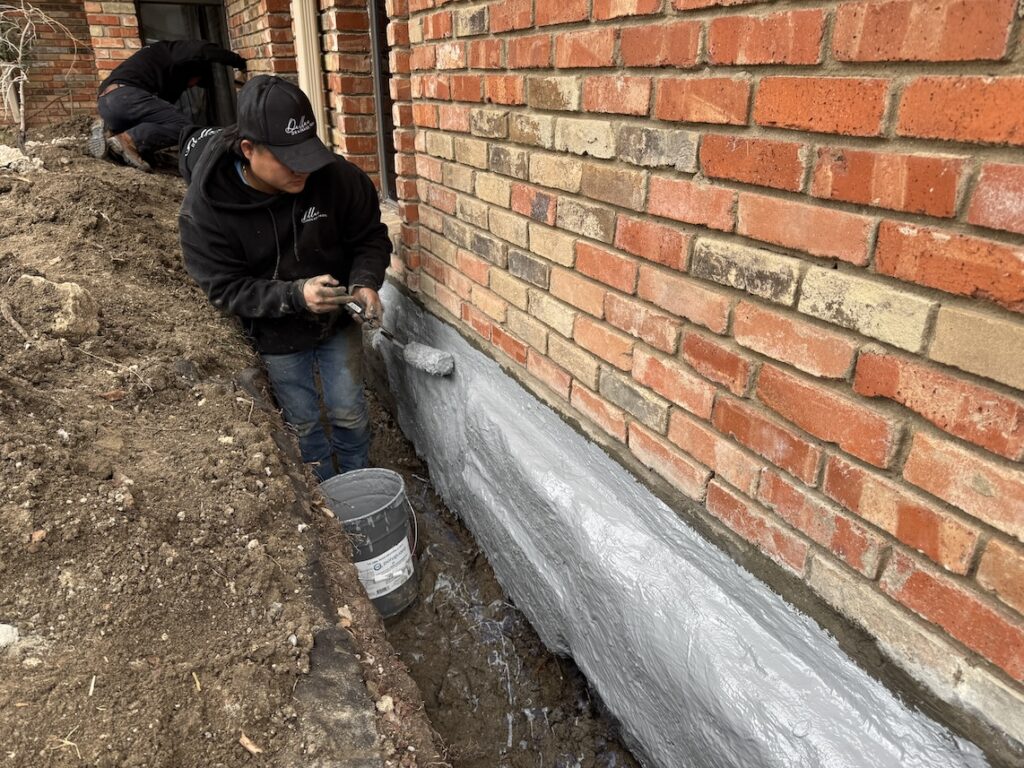
Step 5: Apply Waterproofing Membrane
Now waterproof the exterior wall:
- Seal any cracks with hydraulic cement.
- Apply a waterproofing membrane
- We recommend using an elastomeric waterproof coating, such as Polyguard Stretch Flex
These materials create a seamless barrier to stop moisture from seeping through the wall.
- Add a drainage board or dimple board on top of the membrane. This protects it and directs water down to your French drain.
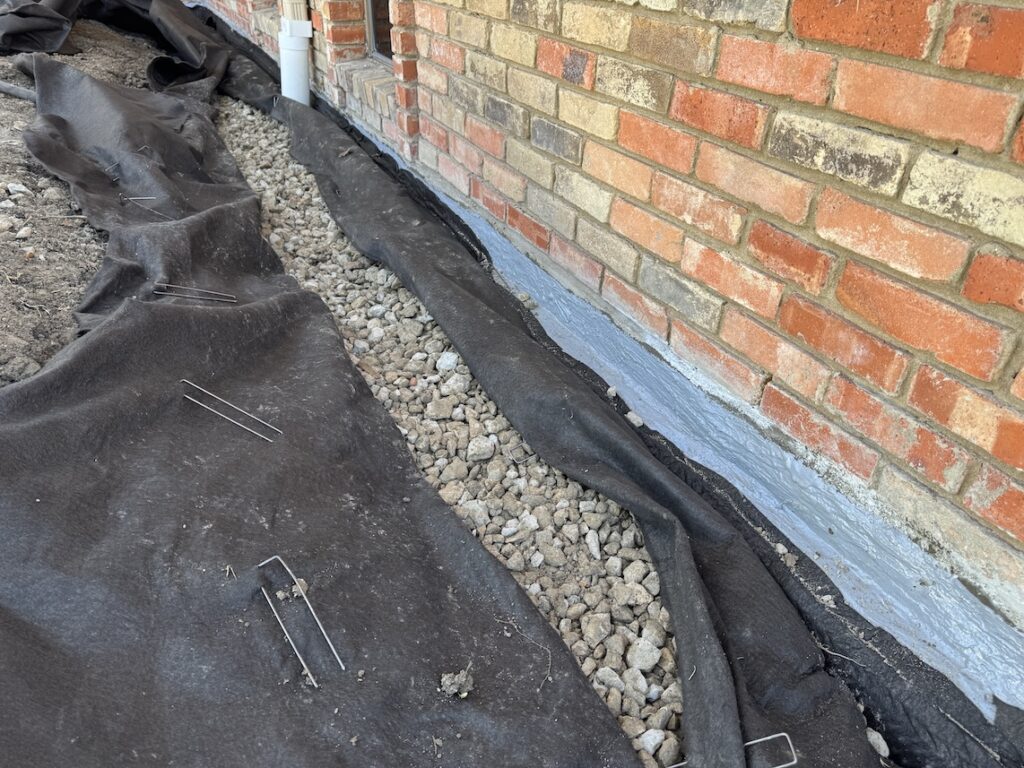
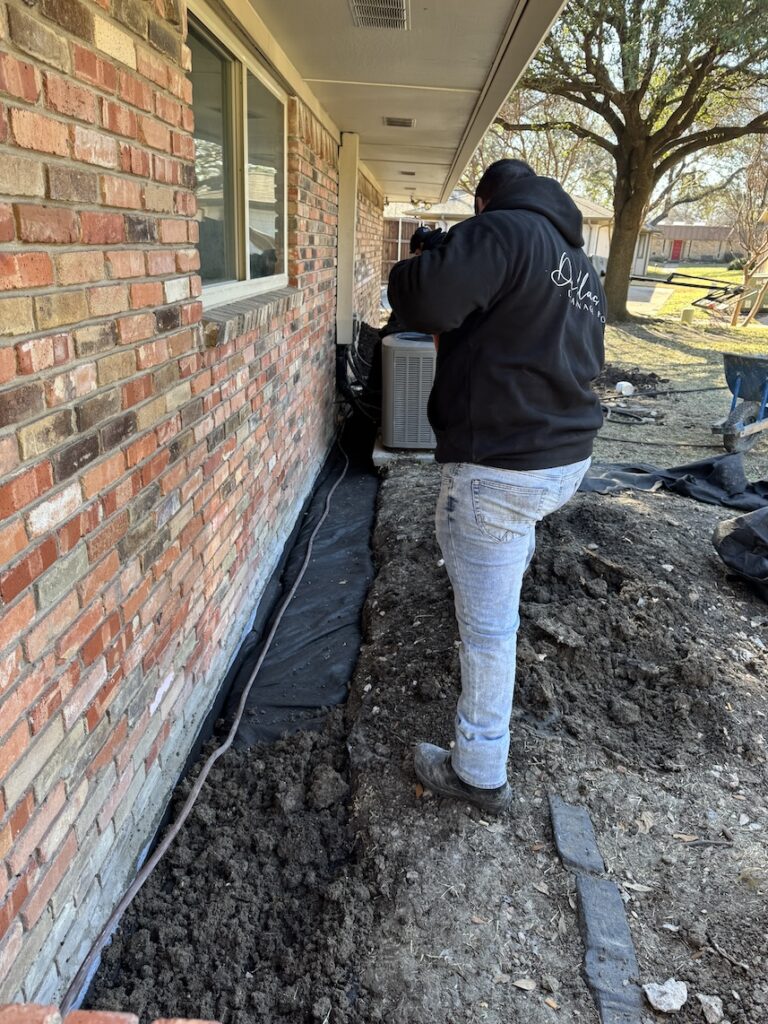
Step 6: Install a Footer French Drain
This is a perforated pipe installed at the base of the wall to carry water away from the foundation.
Installation steps:
- Line the trench with non-woven geo-textile fabric along bottom and both sides, with enough on the side to wrap above after finished.
- Lay perforated drain pipe at the bottom of the trench (holes facing down) along the footer. Ensure it slopes slightly away from the house (at least 1/8 inch per foot).
- Cover the pipe with gravel and back fill to just below the surface so that water drains straight down to pipe.
- Fold over extra fabric, attaching it to itself, to create a continuous and closed system.
- Backfill the remainder with soil or more gravel and regrade so water flows away from the home.
May be necessary: If there is insufficient slope for water to drain away naturally, you may need to connect the pipe to a sump pump so the water can be pushed out.
Step 7: Restore Landscaping
Replace any landscaping or hardscaping removed during excavation. It’s a good idea to plant grass or ground cover to help absorb surface water and reduce erosion.
Maintenance Tips
- Keep gutters and downspouts clean and pointed away from the foundation.
- Check for signs of clogging or damage in your French drain system periodically.
- Regrade soil if it starts to slope toward the house again.
Final Thoughts
Combining exterior wall waterproofing with a footer French drain is a permanent and effective solution to basement water problems. While this project requires effort and investment, it’s well worth it to protect your home’s foundation and indoor air quality. For complex cases or homes with major structural concerns, consider consulting a professional waterproofing contractor.